

Making a physical copy of your favorite tunes or important documents might seem like a thing of the past, but knowing how to burn a CD is still a really useful skill for many folks. Perhaps you want to play music in an older car that lacks modern connections, or maybe you just prefer having a tangible backup of your cherished photos and files. There's a real satisfaction, you know, in holding a disc you've put together yourself.
It’s true that digital streaming and cloud storage are everywhere these days, but CDs still offer a dependable way to keep your media safe and accessible. Think about it: no internet needed, no subscription fees, just your content, ready to go. This guide will show you the straightforward steps to create your own audio or data CDs, helping you get the most out of your computer's disc drive, in a way.
We'll walk through everything from getting your computer ready to dealing with common little issues that pop up, like those pesky gaps between songs or when a disc just doesn't seem to burn right. So, if you're ready to bring your digital files into the physical world, let's get started on learning how to burn a CD, shall we? It's pretty simple, actually.
Table of Contents
- What You'll Need Before You Begin
- Burning an Audio CD for Your Music
- Burning a Data CD for Files and Photos
- Common CD Burning Issues and How to Fix Them
- Frequently Asked Questions About CD Burning
- Wrapping Things Up
What You'll Need Before You Begin
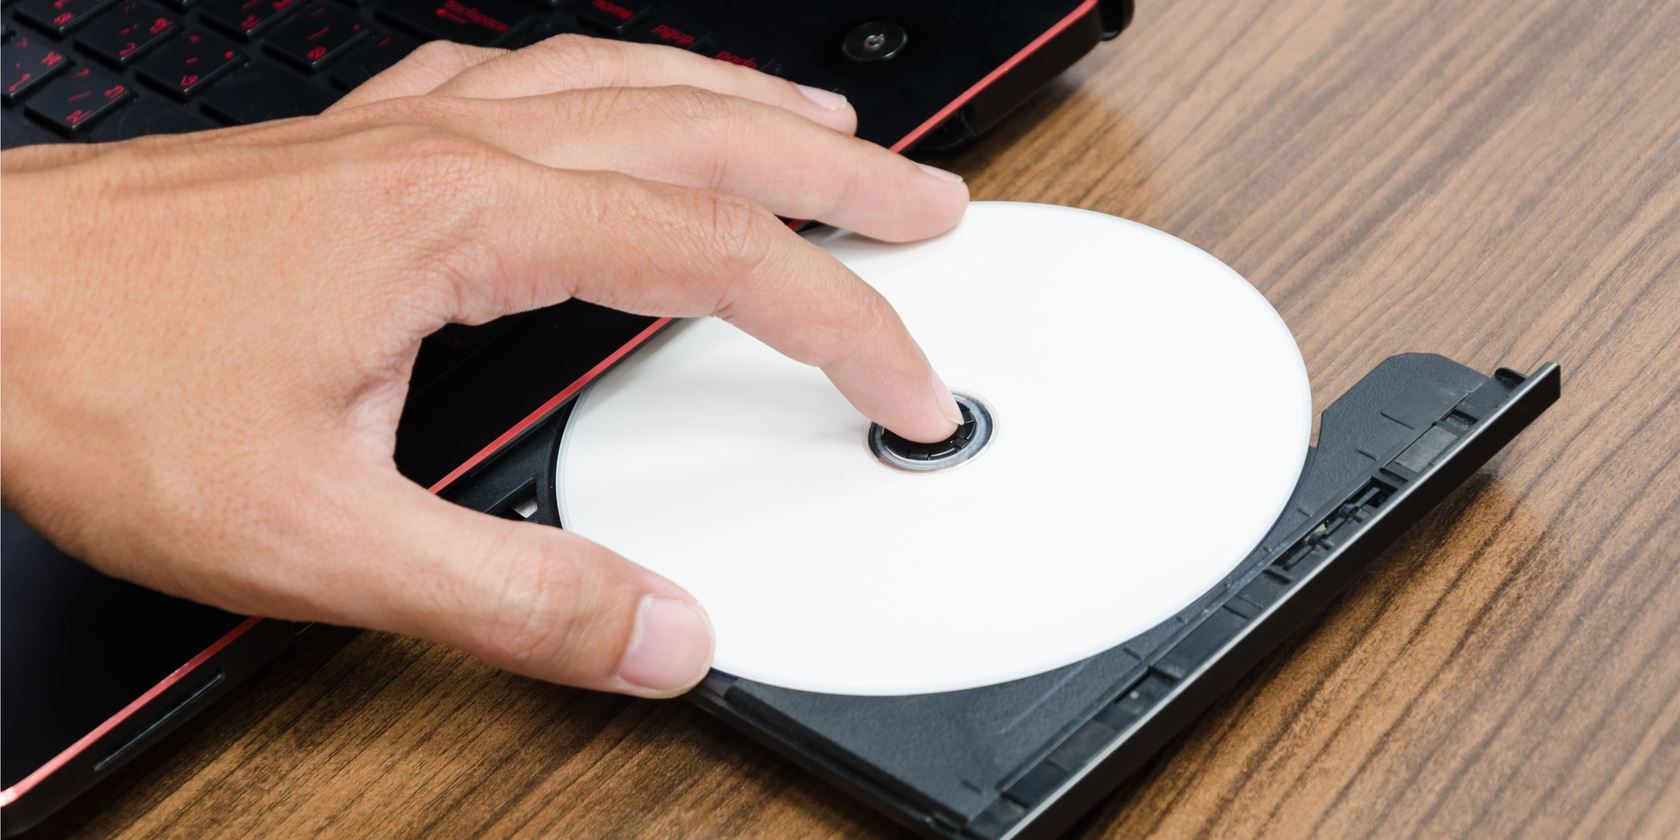
Before you start the process of making a CD, you'll want to gather a few things. First off, you really need a computer that has a CD or DVD burner. Most modern laptops might not have one built in, but many desktop computers still do, or you can use an external CD drive, which is pretty common. Just plug your external CD drive into the computer, and you're good to go, you know.
Next, you'll need some blank CDs. These come in two main types: CD-R (recordable) and CD-RW (rewritable). For most music or data burning, CD-R discs are what you'll typically use, as they can be written to once and then played back many times. CD-RW discs can be erased and reused, which is sort of neat. Make sure you have a few on hand, just in case a burn doesn't quite work out the first time.
Finally, you'll need the files you want to put on the disc. For audio CDs, these are usually music files like MP3s. For data CDs, it could be anything: documents, pictures, videos, or even software programs. It’s a good idea to organize these files into a single folder on your computer first, which makes the whole process a bit easier to manage, really.
Burning an Audio CD for Your Music
Creating an audio CD means you're making a disc that older CD players, like those in cars or standalone stereos, can play. This is different from a data CD, which just stores files. An audio CD converts your music files into a specific format that these players understand. It's a pretty common reason people learn how to burn a CD, actually.
Using Windows Media Player
For those using a Windows computer, Windows Media Player is often the go-to tool for making audio CDs. It’s built right into the system, so you don't need to download anything extra. First, you'll want to open Windows Media Player on your computer. You can usually find it by searching in your Start menu, or by looking through your programs, which is quite simple.
Once Windows Media Player is open, look for the "Burn" tab in the player library. It's usually on the right side of the window, or sometimes at the top. Click on that tab to switch to the burning interface. This area is where you’ll put together your list of songs for the disc, you see.
Now, drag and drop the songs you want to burn from your library into the burn list area. You can add as many songs as will fit on a standard audio CD, which is usually about 74 to 80 minutes of music. Windows Media Player will show you how much space you’re using, which is helpful.
Before you hit the burn button, it’s a good idea to check the burn options. Click the "Burn options" button, and then select "Audio CD." This makes sure the disc will be formatted correctly for music players. This step is important, as a matter of fact, to get the right kind of disc.
Insert a blank CD-R into your computer's CD/DVD drive. Once the disc is in, you can click the "Start burn" button. Windows Media Player will then begin preparing the tracks and writing them to the disc. This process can take a little while, so just be patient, you know.
Exploring Other Music Software
While Windows Media Player is handy, you might find yourself using other programs to manage your music. My text mentions that some people have started using iTunes and RealPlayer to burn CDs, especially if Windows Media Player isn't working for them. These programs often have their own burning features built right in, which is pretty convenient.
For instance, if you're an iTunes user, you can create a playlist of the songs you want, then right-click the playlist and look for a "Burn Playlist to Disc" option. It's a similar idea to Windows Media Player, just with a different interface. These programs tend to be quite intuitive for burning, actually.
The key with any software is to find the "burn" function, select "audio CD" as the disc type, and then add your songs to a list. Always make sure you have your music imported or "ripped" onto your computer first. This is a crucial first step for any burning software, as I was saying.
Dealing with Gaps Between Songs
One common question people have about audio CDs is how to burn a CD without creating those annoying 2-second gaps between each song. Some commercial CDs have songs that run together seamlessly, with no silence, and people want to replicate that. My text points out that reducing the burn speed in the burn options is a good general idea for this, which is something to try.
In Windows Media Player, or other burning software, look for an option related to "gap between tracks" or "disc-at-once" burning. Sometimes, selecting "disc-at-once" instead of "track-at-once" can help eliminate those gaps. You might also find a setting to set the gap length to zero. It really depends on the software you're using, but it's worth looking for, quite frankly.
Reducing the burn speed can also help with overall burn quality, not just gaps. A slower speed gives the burner more time to write the data accurately, which can lead to a smoother playback experience. So, if you're having trouble with gaps or general playback, try setting the burn speed to a lower setting, like 8x or 16x, if you can, anyway.
Burning a Data CD for Files and Photos
A data CD is like a portable hard drive. You can put any type of file on it – documents, pictures, videos, or even software installers. This kind of disc is great for backing up important information or sharing large collections of files with someone. It's a pretty straightforward way to transfer things, actually.
Using Windows Explorer
If your computer has a CD or DVD burner, you can copy files to a writable disc directly using Windows Explorer, which is also called File Explorer in newer Windows versions. This process is often referred to as "burning a disc," and Windows makes it fairly simple.
First, insert a blank CD-R or CD-RW into your computer's disc drive. An "Autoplay" dialog box might pop up, asking what you want to do with the disc. If it does, you can choose an option like "Burn files to disc" or "Open folder to view files," and then proceed from there, you know.
If the Autoplay box doesn't appear, just open File Explorer (you can usually find it by clicking the folder icon on your taskbar or searching for "File Explorer"). Then, navigate to "This PC" or "Computer," and double-click on your CD/DVD drive icon. This will open the disc, which is currently empty.
Now, drag and drop the files and folders you want to burn into the open disc window. As you add files, Windows will show you how much space you're using. Once you've added everything you want, look for a "Burn to Disc" button or an option in the toolbar, often under a "Manage" tab, which is pretty common.
Click "Burn to Disc." A wizard will then guide you through the final steps. You'll be asked to give the disc a title, and then you can choose how you want to burn it. Windows can burn discs in a "Live File System" format, which lets you add or remove files later, much like a USB drive. Or, you can choose a "Mastered" format, which is better for discs that will be used on other computers or older systems, and you won't be adding more files to it, very much like a final version.
Select your preferred burning option and click "Next" or "Finish." Windows will then start copying the files to the disc. Once it’s done, the disc will typically eject, and your files will be safely stored on the CD, ready to be used. This process is quite reliable, actually.
Common CD Burning Issues and How to Fix Them
Sometimes, even with all the right steps, CD burning doesn't go as smoothly as you'd hope. My text brings up several common problems, and it’s good to know how to tackle them. Let's look at some of these issues and how you might fix them, in a way.
"Burn Complete" But No Files on Disc
This is a frustrating one: you go through the whole burning process, the software says "burn complete," but when you check the disc, it's empty or unreadable. My text mentions this specific problem. One reason this happens could be a faulty blank disc, so try a different one first. It's a quick check, you know.
Another possibility is that the burn speed was too high for your drive or the disc. Try reducing the burn speed in your software's options, as suggested in my text. A slower burn can often fix issues with incomplete or corrupted burns. Also, ensure your disc drive's firmware is up to date, which can sometimes resolve these kinds of glitches, too.
Sometimes, the software itself can be the problem. My text indicates that some people have switched to using iTunes and RealPlayer because Windows Media Player wasn't working for them. If one program fails, trying another reputable burning application might just do the trick. It’s worth experimenting, actually.
"No Disc Drive Capable of Burning" Message
You might encounter a message like "You don't have a disc drive capable of burning to CD or DVD," even if you think you do. This can happen, especially if you're trying to burn from a program like Photo Gallery, as mentioned in my text. First, make sure your drive is actually a burner (a CD-RW or DVD-RW drive), not just a reader (CD-ROM or DVD-ROM).
If you know your drive is a burner, the issue might be a driver problem or a conflict. Try running the burning troubleshooter in Windows, if one is available. You can usually find troubleshooters in your system settings. Also, checking if you are able to burn other CDs on the computer, as my text suggests, can help isolate the problem to a specific disc or file type, which is pretty helpful.
Sometimes, a simple restart of your computer can clear up temporary software glitches. If the problem persists, you might need to update or reinstall your disc drive's drivers. You can do this through Device Manager in Windows. It's a bit more involved, but it often solves these recognition issues, very often.
Burning Problems After Windows 10 Update
My text specifically mentions that some users with Toshiba and Compaq laptops updated to Windows 10 and then found neither would burn CDs in Windows Media Player, with the program just saying it "has" or "keeps saying it has." This points to a compatibility issue or a driver problem introduced by the update.
For these kinds of post-update issues, checking for updated drivers for your CD/DVD drive is usually the first step. Visit your laptop manufacturer's website (Toshiba or Compaq, for example) and look for Windows 10 drivers for your specific model's optical drive. Installing these can often restore functionality, which is a good thing.
If new drivers don't help, trying alternative burning software like iTunes or RealPlayer, as my text suggests, is a practical workaround. Sometimes, older programs like Windows Media Player might not fully adapt to new operating system changes, while other software might have more consistent updates. This can be a real solution, you know.
Another thing to consider is running Windows' built-in compatibility troubleshooter on Windows Media Player itself. Right-click the program's shortcut, select "Properties," and then look for a "Compatibility" tab. You might be able to run it in a compatibility mode for an older Windows version, which can sometimes trick it into working properly, actually.
General Burning Tips
Use Quality Discs: Not all blank CDs are created equal. Using reputable brands can reduce the chances of failed burns or playback issues. It's a small investment that can save you frustration, you know.
Close Other Programs: While burning, try to close other applications running on your computer. This frees up system resources and helps prevent interruptions that could corrupt the burn. It’s a good practice, very much so.
Keep Your Drive Clean: Dust and debris can sometimes affect a disc drive's performance. A special CD/DVD lens cleaning disc can help keep things running smoothly. This is a fairly simple maintenance step, you see.
Check Your Files: Make sure the audio or data files you're trying to burn are not corrupted or protected in a way that prevents copying. If a song can play on your computer but not burn, it could be a rights management issue, as my text implies when it asks, "why can i play and add certain songs to the burn list, but can't burn."
Consider an External Drive: If your built-in drive is giving you constant trouble, or if your laptop doesn't have one, an external USB CD/DVD burner can be a great solution. They are generally plug-and-play and often quite reliable, which is a real plus. You can find some great options for external drives if you look around.
Frequently Asked Questions About CD Burning
Can I burn a CD on both Windows and Mac computers?
Yes, you certainly can burn a CD on both Windows and Mac computers. My text points out that this is possible. Both operating systems have built-in tools or readily available software that allow you to create audio or data discs. The steps might look a little different depending on your system, but the core idea is the same, you know. For Mac users, you'll often use Finder or iTunes (now Music app) to manage your burning needs.
Why does my CD burning process say "prepared tracks" but then nothing burns to the disc?
This is a common issue, and my text specifically mentions it: "it only prepared the tracks and then said burn complete, but did not actually burn the files to disc." This can happen for a few reasons. It might be a bad blank disc, a burn speed that's too fast for your drive, or even a temporary software glitch. Trying a different blank disc, reducing the burn speed, or restarting your computer can often help resolve this. Sometimes, trying another burning program, like iTunes or RealPlayer, as my text suggests, can also fix it, actually.
How do I make sure there are no silences between songs on an audio CD?
To get rid of those 2-second silences between tracks on an audio CD, you'll want to look for specific options in your burning software. My text suggests reducing the burn speed as a good general idea. Beyond that, search for settings like "Disc-at-Once" burning or an option to set the "gap between tracks" to zero. Not all software has these precise controls, but many do, and it's worth checking your program's settings for them, very much so.
Wrapping Things Up
Knowing how to burn a CD, whether for your favorite music or for keeping important files safe, is a skill that still holds value today. We've walked through the steps for creating both audio and data discs, using common tools like Windows Media Player and Windows Explorer. We also looked at some of the common frustrations you might face, like those annoying gaps between songs or when a disc just won't burn right, and discussed ways to sort them out.
Remember, having the right equipment, like a capable CD burner and blank discs, is the first step. Then, choosing the right software and understanding its options, like burn speed and disc type, makes all the difference. With a little patience and these tips, you can certainly create your own CDs quickly and efficiently, as my text suggests, and keep your digital memories in a physical form.
If you're looking for more ways to manage your digital media, you can learn more about digital organization on our site. And for specific troubleshooting steps on various computer issues, you might find more helpful information on our dedicated support page.


Detail Author:
- Name : Vidal Waters
- Username : yundt.stan
- Email : bessie.stroman@gmail.com
- Birthdate : 1999-06-07
- Address : 54947 Beer Prairie South Mohammedside, DC 95365-0643
- Phone : +19208977655
- Company : Sanford-Lynch
- Job : Welder and Cutter
- Bio : Non velit deleniti sed. Sunt aut mollitia error voluptates provident quo. Consequuntur sapiente quis quis pariatur.
Socials
instagram:
- url : https://instagram.com/ratkea
- username : ratkea
- bio : Autem dolores voluptates ut. Qui harum ea rerum placeat libero. Esse omnis fugit ut culpa est.
- followers : 4224
- following : 941
facebook:
- url : https://facebook.com/angelica_ratke
- username : angelica_ratke
- bio : Aliquam illo eveniet qui tempora. Dolor quisquam non a sit magni est.
- followers : 1268
- following : 2897
tiktok:
- url : https://tiktok.com/@angelica9356
- username : angelica9356
- bio : Quia quia esse et illo nulla quas est recusandae.
- followers : 6460
- following : 67
twitter:
- url : https://twitter.com/ratke2007
- username : ratke2007
- bio : Velit ea at occaecati assumenda. Inventore doloribus iusto nam. Et et voluptas omnis beatae. Quia similique sed et repudiandae cumque omnis.
- followers : 1702
- following : 600


 Bonus
Bonus